
Salvaging a bad brake job on an E9 3.0CSL
- kylegeekie
- Sep 28, 2024
- 3 min read
We have the privilege (and headache) of managing part of the restoration of this beautiful RHD E9 3.0 CSL. We dive into a little bit of history and some pictures (after a nice detail) to first whet your appetites, before we go into 'surgery'.
In case you needed a refresher - the 3.0 CSL was introduced in 1972 as a homologation special to qualify for racing in the European Touring Car Championship. The heart of the car is a 3003cc inline 6 producing 200 bhp, capable of 6.9s 0-100kmh, a FAST car back in the day. Top speed limited to 220kmh in 4th gear.
Fun fact: The E9 was the genesis of one BMW's signature features, the Hoffmeister Kink, named after its designer Wilhelm Hoffmeister


The car was rescued from a previous workshop (let's call it workshop A) that had let it sit for a year, unable to solve a rough idling problem and also butchered the brakes. After months of chasing and questioning, the workshop finally surrendered the car and withdrew from the project, leaving the owner to solve these issues.
It has since been moved to Geektuned's associate workshop and is now being restored once again under our close supervision. We'll take you through a series of pictures that will hopefully communicate the pain of mistakes made due to ignorance and arrogance.

Years ago, we actually sourced the 4 new brake calipers for this car, as one of the caliper piston seats had cracked and was leaking. This type of chip-off is irreparable hence new calipers were the only recommended option.

This isn't a great photo, but stay with us. There is something wrong with this caliper on the RHS front:

For reference, the picture below is what a nice new caliper looks like on the front LHS. What we are looking at here are the 2 nipples that are not fully screwed in/seated. And there is a reason for this:

This is what happens when you use the wrong nipple shape (please no dirty jokes), cross thread AND tighten it so much that it cracks the caliper. And yes, the same mistake was repeated on both sides.
The correct brake nipples have a tapered shape which is what matches the inside thread and provides the fluid sealing force. Unfortunately, the Workshop A mechanics that worked on the car used square shaped nipples, which upon tightening to achieve the necessary thread engagement, damaged the thread irreparably.

On the outer side (LHS in above picture), Workshop A attempted to solve the issue first by welding it - evidenced by the messy bead of material just below the nipple. When this failed, the next attempted solution was to use some kind of epoxy as a sealing layer, followed by screwing in the nipple. This is a 1-time botch job, for 2 reasons - 1) it won't seal properly and will leak, and 2) it will be extremely difficult to remove it later should removal for servicing be required.

On the inner side (shown below), an same attempt of differing strategy was made. The discoloration in material results from gas contamination (wet argon) during the welding process, and/or the surface not being prepped/dried properly. Hence there is onset corrosion in the area, which may also contribute to leak in the longer term.

We had similar incredulousness for the rear - Workshop A mounted the rear calipers flipped, with the bleed nipple at the bottom - meaning it would be more exposed to harm when driving. The pictures below show the corrected mounting position for both sides.


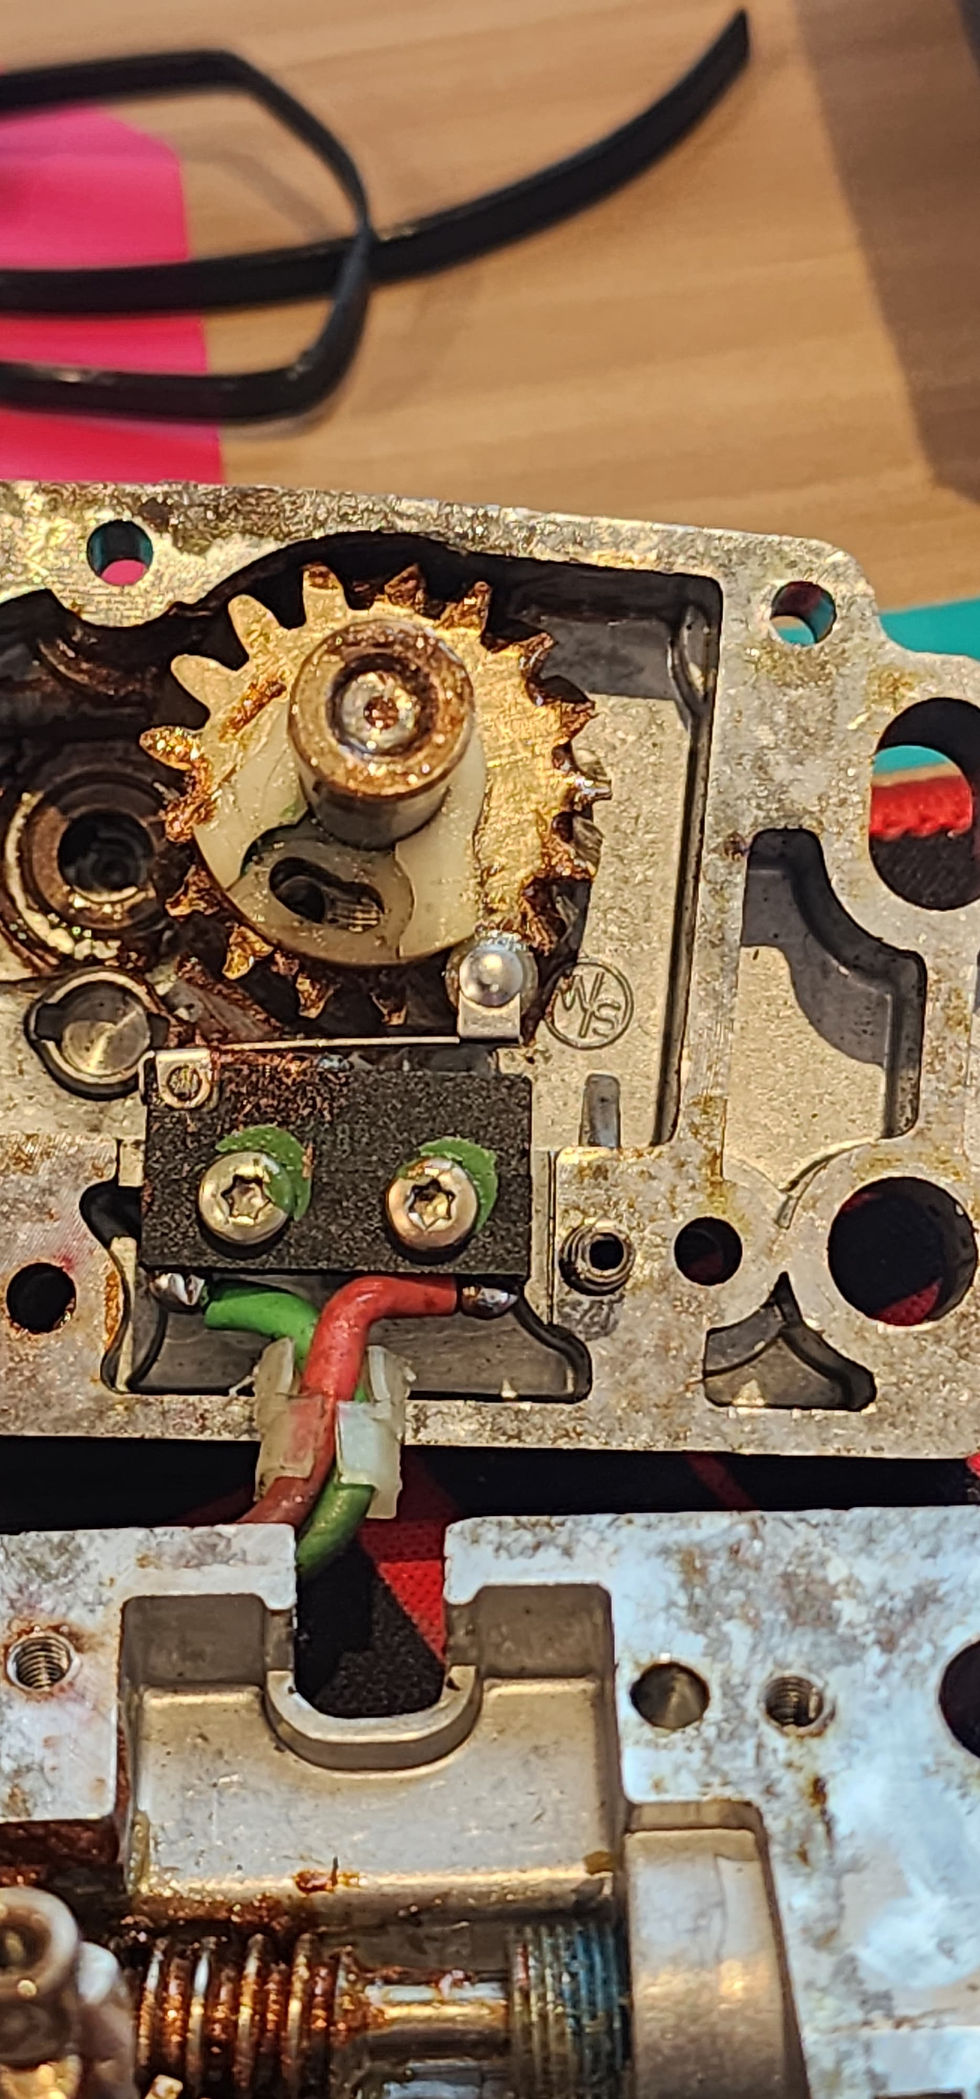
And to conclude today's therapy session, we find 1 more surprise on the throttle cable - an electronics screw connector, to join the end of the cable to the linkage. We leave this to our readers to decide if this is genius or brave.

Geektuned will post more updates as we go along. Stay tuned for the next chapter in this adventure.
Comments